 17 April 2021
Steps of Fusion Splicing Fiber Optic Cables
What is Fusion Splicing?
Fusion Splicing means securely connecting two optical fiber cables by heating their core end faces and pushing them together to fuse them as a spliced single fiber that can transfer light signals with near zero loss at the splicing point.
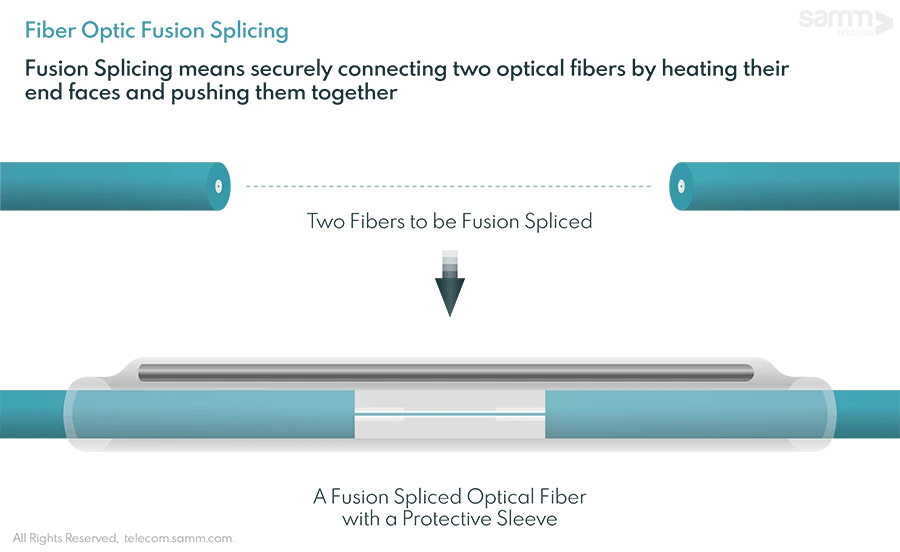
Fiber splicing using fusion is the most common method among network technicians because it provides the lowest loss and the least signal reflectance compared to mechanical splicing, which requires using connectors and does not relatively give reliable and practical results. Fusion Splicing require certain procedures like cleaving, aligning, heating and pushing the end faces of fibers together, and there special devices and tool that help technicians in performing proper fusion splicing.
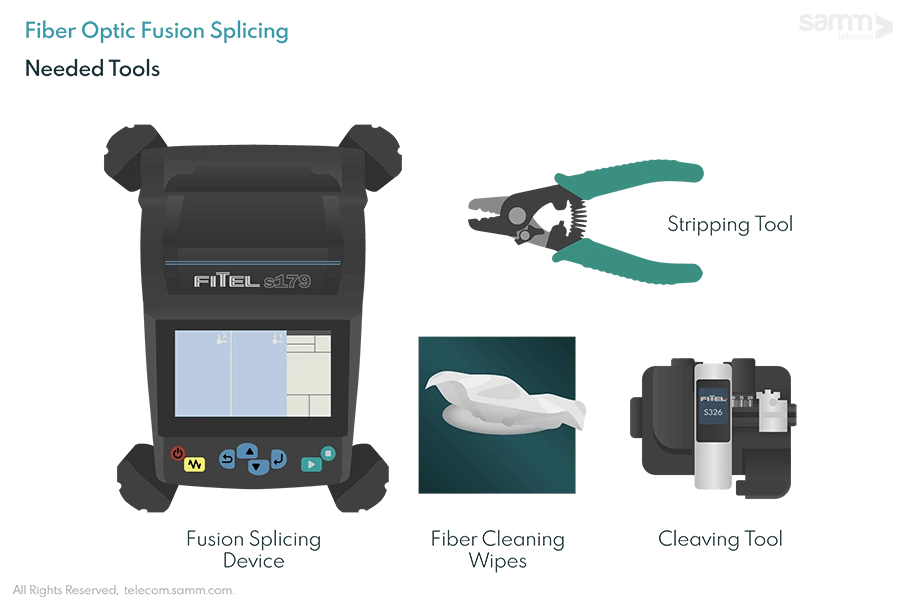
Main Steps of How to Do Fusion Splicing of Optical Fibers.
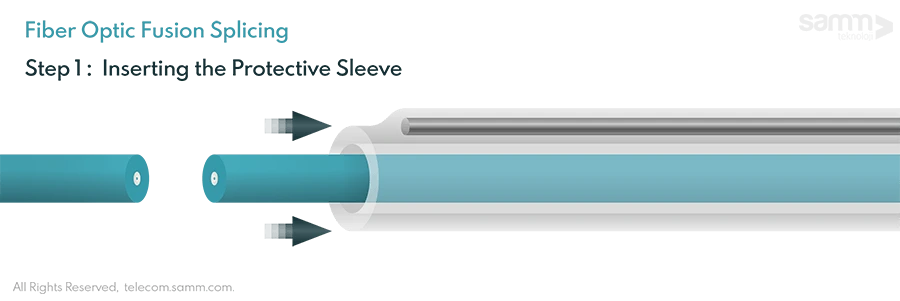
1. Insert One Side of Fiber in the Splice Protective Sleeve.
Although, protecting the fusions splice part of the fiber is last step of this process, a technician should not forget to insert the heat shrink protection sleeve onto one side of the fibers. The protection sleeve is usually a solid tube that can be put on a fiber end but cannot be wrapped around the fiber after it has been spliced. In addition, the splicing area must be very clean and the fusion device must be place on a stable surface.
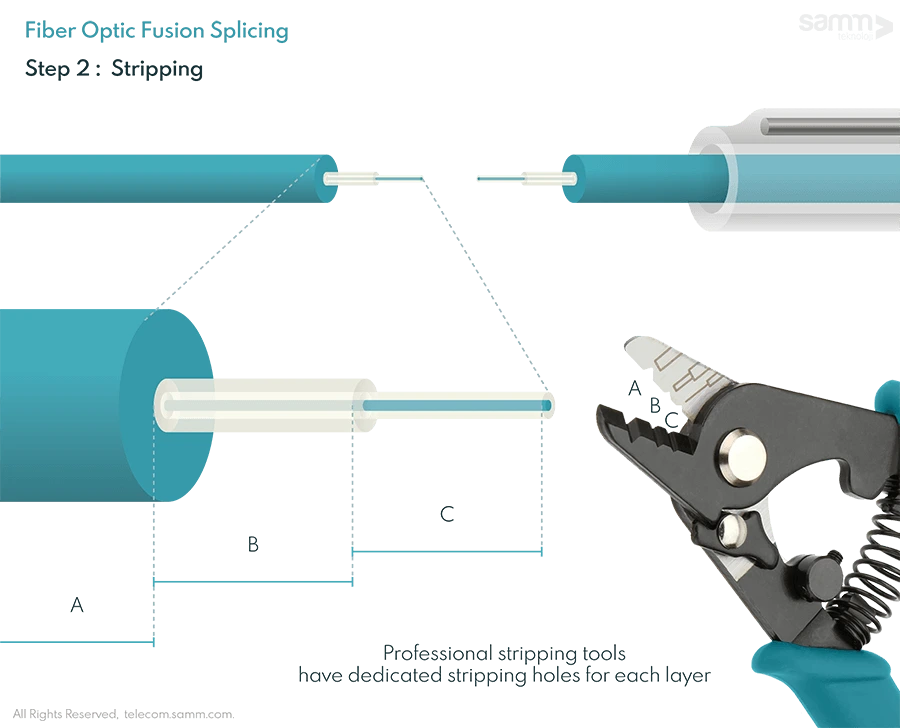
2. Strip the Fibers’ Buffer Coatings Accurately.
In order to fuse two fiber ends together they need to be stripped down to the cladding layer; only the core and the cladding layer of the fiber can be fused together and the all buffer and coating layers must be removed. There are professional stripping tools for optical fibers, which usually have dedicated stripping holes for the 250μm buffer, tight buffer layer and other additional coating layers and jackets. The more a technician practices fiber stripping, the more accurately they can do it efficiently in a one-slide maneuver for each stripped layer. The fusion device has instruction on the stripping lengths of each layer and some devices have fiber detachable holders for easier handling of the fiber, especially if it is a Ribbon cable, which has multiple fibers that can be fused at the same time.
3. Clean the Fibers from Remaining Coating Particles.
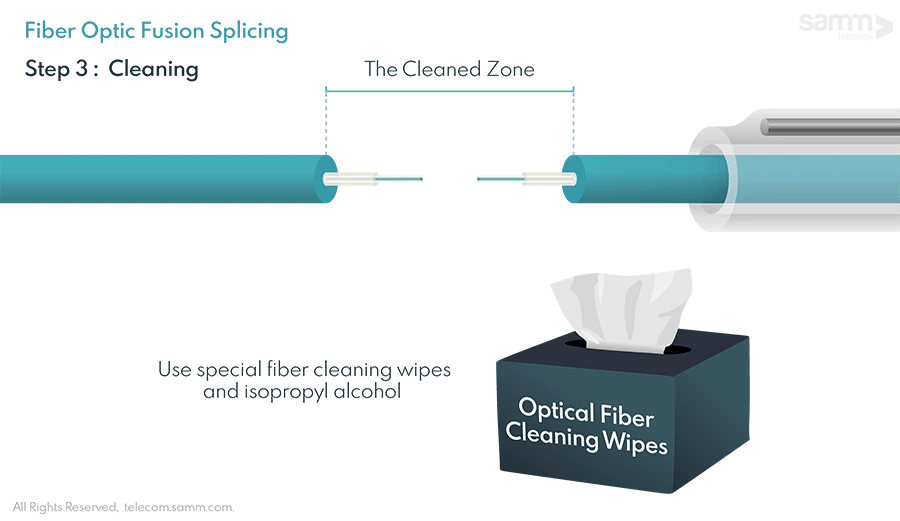
The stripping tool might leave some waste particles of the stripped buffer and coating layers. This waste can be easily cleaned using isopropyl alcohol and specially designed fiber cleaning wipes. Please not that regular cleaning wipe might scratch the fiber from the sides, and there is no need to clean the end face of the fibers excessively because they are to be cleaved in the next step.
4. Cleave the Ends of Fibers at Precisely 90° Angle.
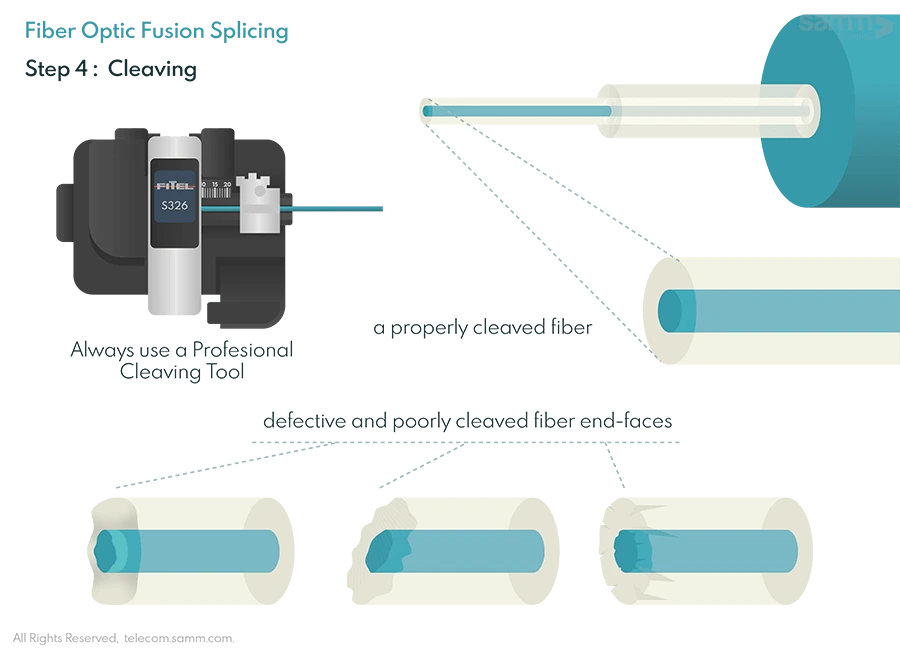
A fusion-splicing device usually comes with a compatible fiber cleaver, which is a tool the trims the tip of a fiber strand at exactly 90° angle. An optical fiber cannot be cut using any kind of cutters or scissors, or else the end face of the fiber would be deformed and result in signal loss after splicing. For ribbon fiber cables, there are special cleavers that are deigned to cleave up to 12 fibers or more at the same time.
5. Brace the Fibers in the Fusion Splicing Device.
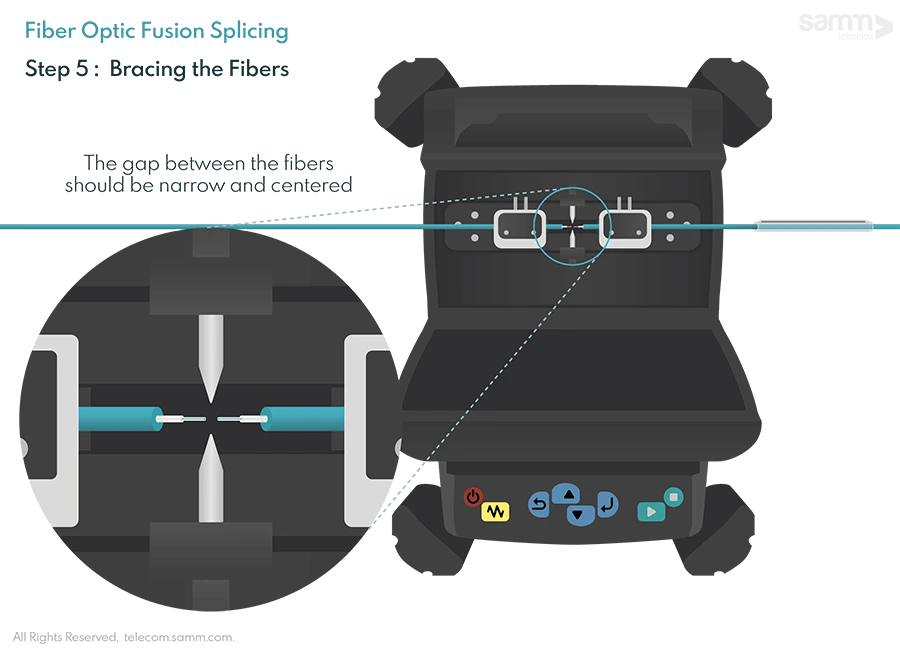
Place the ends sides of stripped fiber in the allocated slots on the device and make sure the gap between them is appropriately small and centralized in between the heating electrodes. Splice fusion devices generally have detachable holders or fixed clamps that secure the fibers in place, and make the positioning step quite easy to do repeatedly. When you are using a ribbon fusion device, it should have special tiny guides to keep the fibers aligned and separated by equal distances.
6. Start the Fusion Splicing Process.
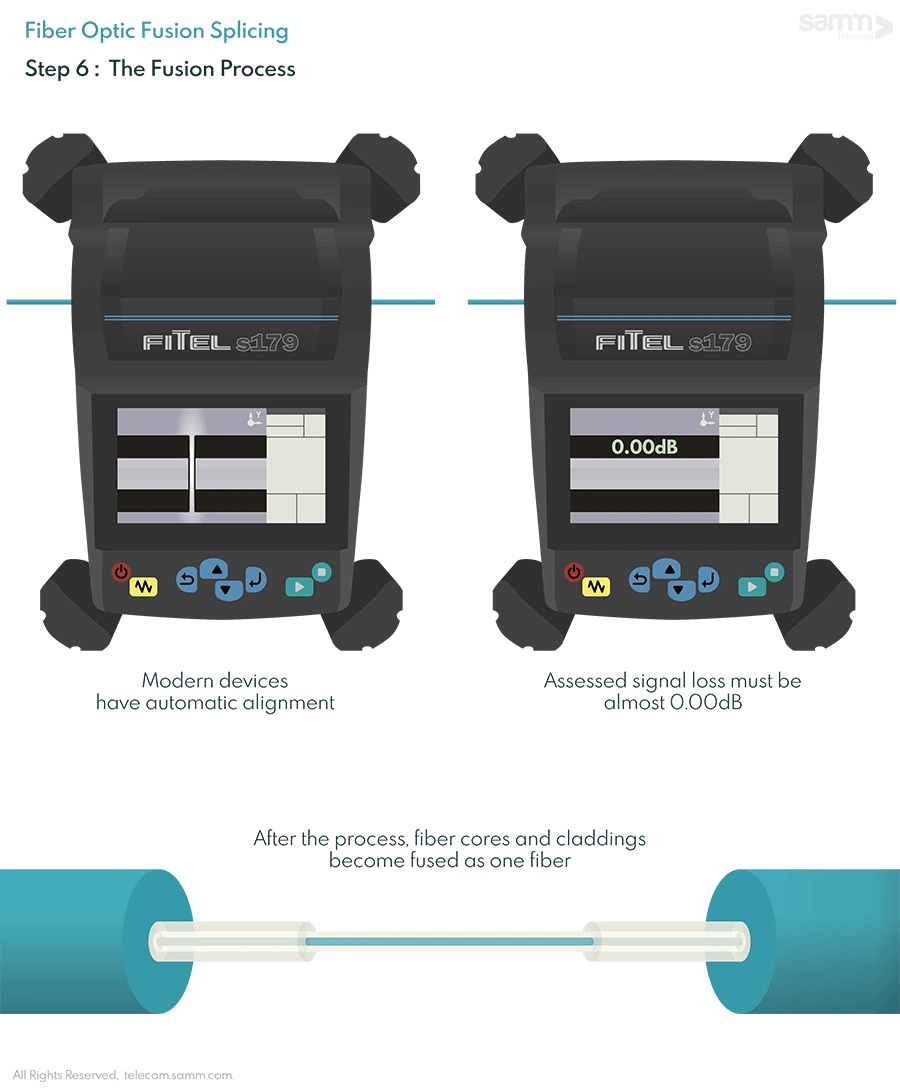
Before activating the alignment and fusion process; make sure the setting of the device are set correctly for the type, single mode or multi-mode for example, and the number of fibers to be spliced. Fibers are very delicate, and the correct settings help the device apply the correct amount of heat and push the fibers together at the correct speed to have perfect splicing results and zero signal loss. Besides, in modern devices the final alignment, the electric heating and the fusion process are all done automatically and the fusion device has a magnifying camera that demonstrates the alignment and fusion process on the screen. The final estimated fiber loss will be displayed on screen, and it should be as close as possible to 00.00dB for a better connection. After the process ends, the two sides of fiber become one continuous strand, but we need to handle them carefully while doing the last protection step.
7. Heat Shrink the Protective Sleeve Around the Splice.
Finally, we can apply the heat shrink protective sleeve, which we left on one side of fiber, on the spliced part of the fiber. However, you need to make sure to hold the fiber from the side where the sleeve is, and push the sleeve away to the middle; and not hold the far side of the fiber and pull the sleeve towards your hand. Otherwise, the movement of the sleeve might pressure the splicing point and damage it.
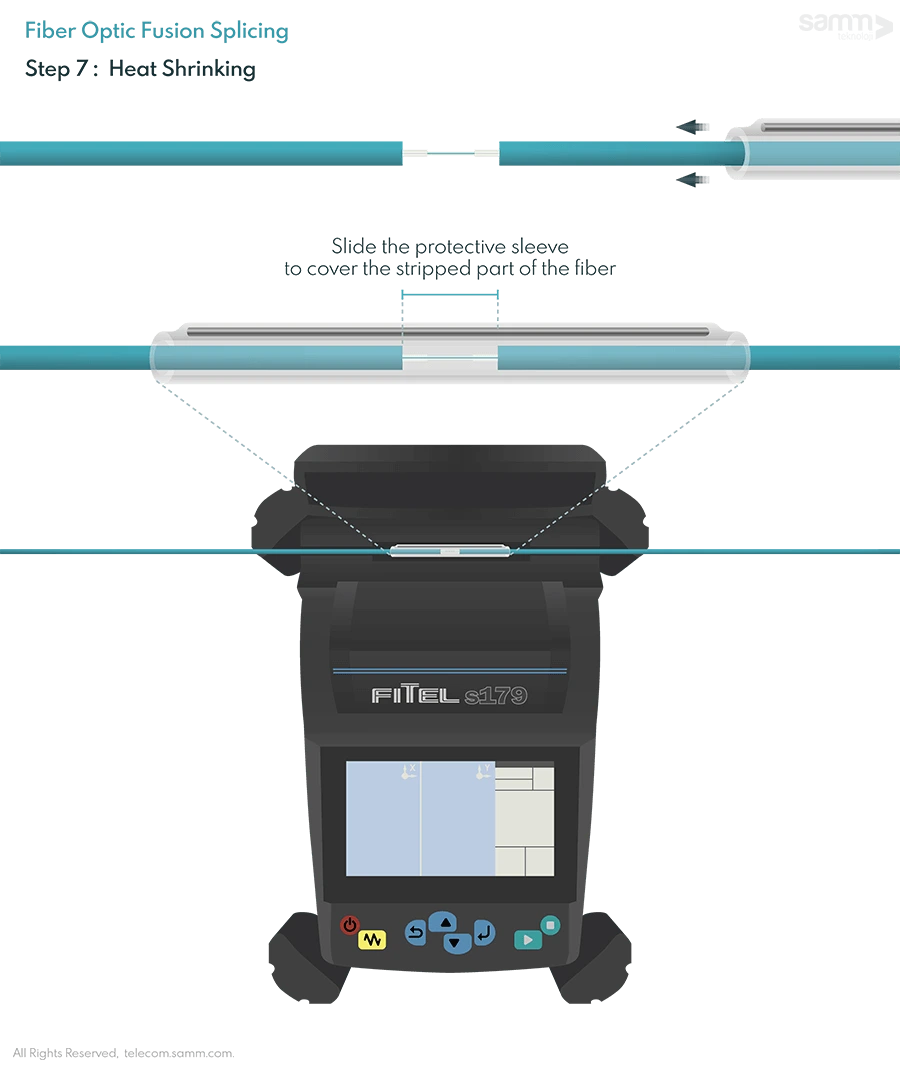
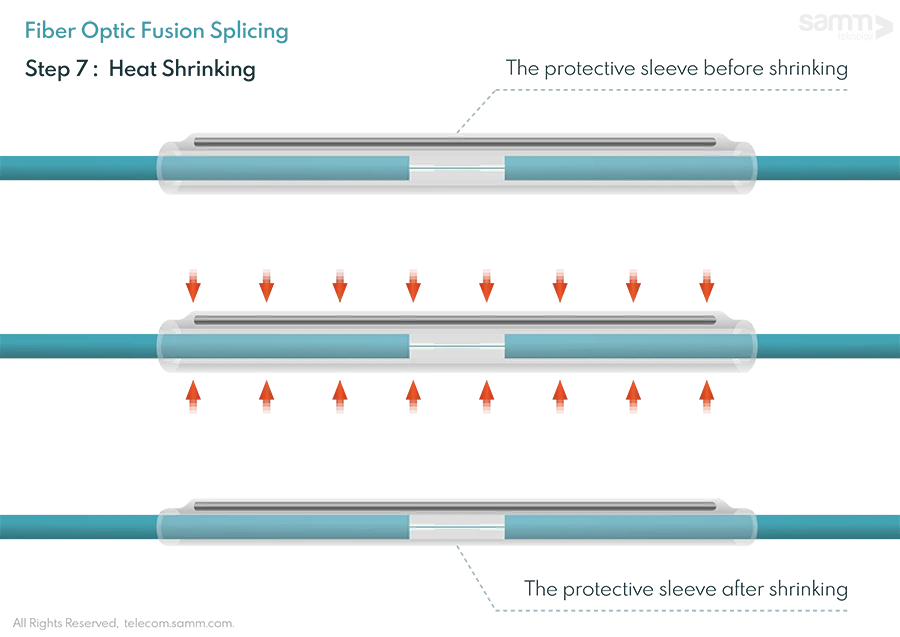
After completely covering the stripped splicing part of the fiber with the protective sleeve, you can now place them together in the allocated heat-shrinking slot and start the sleeve heating step. The device will beep when the heating is finished and the sleeve becomes tightly sealed onto the spliced fiber and you the splicing of the fiber is now complete.
Where is Fusion Splicing Used?
In field applications that require repairing broken fiber links, fusion splicing is the most efficient method of joining two fibers together. It is usually used various in FTTX applications, buried splice closures, data center panels and building distribution boxes.
What is Ribbon Fusion Splicing?
Splicing ribbons of fiber, which usually have 12 parallel fibers, is similar to fusion splicing one fiber but it requires special ribbon holders and a fusion-splicing device that is compatible with the process of fusing 12 fibers or more at once.
What is a Fiber Cleaver?
A fiber cleaver is a cutting tool designed specially to cut fibers in a precise manner in order to cut one or multiple fibers in a 90° angle. Using a fiber cleaver is essential for fusion splicing in order to have clean fiber end faces and get perfectly fused fiber joint.


About Samm Teknoloji
Fiber Optic Cable Manufacturer
Being a Turkish fiber optic cable manufacturer and an efficient supplier for Europe, Asia and America, SAMM Teknoloji joined the global market with very high potential. SAMM designs and manufactures a wide variety of fiber optic cable types optimized for fixed or mobile networks that can be used in indoor and outdoor environments. SAMM offers reliable, cost-effective optical products to meet the needs of customers with innovative products developed and tested in accordance with international standards.
Fiber Optic Assemblies Producer
As a fiber optic cable assemblies producer and supplier in Turkey and an optical assemblies supplier for Europe and Asia, Samm Teknoloji has been providing high-quality and reliable fiber optic cable assemblies since 2006. Due to our fully equipped production facilities, laboratories and long-term expertise in fiber optics, we are able to produce a first class fiber optic assemblies portfolio that ensure the highest level reliability. Therefore, one of the main priority is the ongoing expansion and advancement of the manufacturing capabilities.
Data Center Solutions Producer
As a Turkish producer of future-ready fiber optic data center equipment, SAMM Teknoloji produces UHD ultra high density MTP/MPO panels and cassettes, modular panels and cabling raceways. SAMM Teknoloji has also kept pace with the accelerating spread of Cloud Computing, which has increased the need for mega Data Centers. SAMM provides Data Center solutions and products that suit all structures with high data storage density, data traffic and data security.

